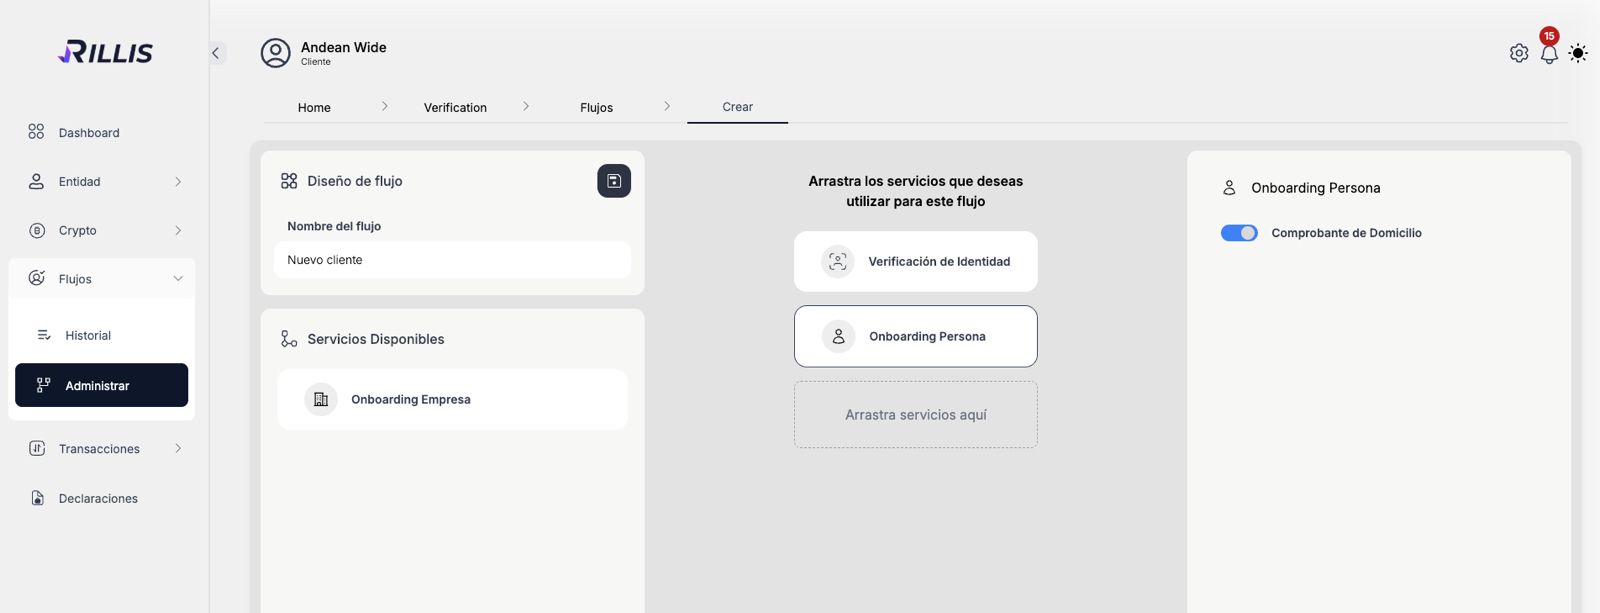
Home
Home
  1. ๐ŸŒŠ Flow API
  • ๐Ÿš€ Getting Started
  • ๐Ÿ”Ž Screening API
    • Overview
    • Blacklist Matching Logic
    • ๐Ÿ“ก Endpoints
      • Blockchain Analysis
      • Individuals Analysis
      • Organizations Analysis
      • Screening Entities Summary Analysis
      • Create BlackList
      • Get All BlackList Records
      • Get Blacklist Record by ID
      • Delete Blacklist Record by ID
      • Update Blacklist Record by ID
      • Update Blacklist Settings Account
  • ๐ŸŒŠ Flow API
    • Overview
    • Flow Step: Identity Verification
    • Flow Step: Onboarding Individual
    • Flow Step: Onboarding Organization
    • ๐Ÿ“ก Endpoints
      • Authentication token
      • Get Flow Instances
      • Get Flow Instance By Id
      • Get File from Flow Instance
      • Identity: Get Details
      • Identity: Get Files
      • Identity: Update Status
      • Onboarding: Get Details
      • Onboarding: Get File
      • Onboarding: Get Multiple Files
      • Onboarding: Update Status
      • Onboarding: Get Entity by document number
      • Onboarding: Get Entity List by document number
    • ๐Ÿ“ค Webhooks
      • Overview
      • Flow
      • Identity Verification
      • Onboarding Individual
      • Onboarding Organizations
      • Identity Verification by Onboarding
  • ๐Ÿ’ธTransaction Screening API
    • ๐Ÿ”‘ Authentication
    • Overview
    • Transaction Analysis
    • Monitoring & History
    • Document Types
    • Supported Currencies
    • Diagram
    • ๐Ÿ“ค Webhooks
    • ๐Ÿ“ก Endpoints
      • Submit Transaction
      • List Transactions
      • List Document types
      • List Cryptocurrencies
      • Register remitter
      • Register Beneficiary
  • ๐Ÿ“‚ Resources
    • Concept Details
    • Enum Validation
Home
Home
  1. ๐ŸŒŠ Flow API

Overview

The Flow API is designed to create customizable verification and onboarding workflows. Each flow is built from a sequence of steps that can be combined according to your business needs.

๐Ÿ—๏ธ Building a Flow#

A flow consists of different types of steps, each responsible for a specific part of the process:
Step TypeDescription
Identity VerificationPerforms identity verification, analyzing identity documents and other relevant data for compliance.
Onboarding IndividualUsed to collect detailed information about individuals, including personal data, proof of address, etc.
Onboarding CompanyUsed to collect detailed information about a company, including business data, legal representatives, and final beneficiaries.

Typical Use Case#

The most typical use case is to combine the Identity Verification step with the Individual Onboarding step, ensuring that the end customer's document and the compliance data of the same person are valid.

How to Create a Flow#

1๏ธโƒฃ Design Your Flow
Define the sequence of steps you want to include (for example: identity verification โ†’ onboarding persona).
Decide the order of these steps and any specific configurations for each.
2๏ธโƒฃ Configure Each Step
Each step requires specific configuration depending on its type (e.g., setting up required fields for onboarding forms, configuring verification providers).
3๏ธโƒฃ Integrate with the SDK
Once your flow is defined, integrate it into your frontend or backend using the Rillis SDK.
Make sure to specify the webhook URLs to receive real-time updates for each step.

Visual Overview#

Below is a screenshot from the Rillis platform, illustrating how you can drag and drop the available services to build your custom flow:
Flow Creation Interface

Integrating the Widget in the Frontend#

To integrate Rillis verification flows into your application, you can use the Rillis web component, a lightweight and customizable widget that displays a button to trigger a configured flow. Each flow can include one or more steps, such as identity verification, individual onboarding, or company onboarding, allowing you to tailor the process to your business needs.

โœ… Installation Steps#

1๏ธโƒฃ Import the Widget Script#

Add the following script to your frontend:

2๏ธโƒฃ Insert the Web Component#

Use the custom element anywhere in your frontend. This renders a verification button with your desired configuration:

โš™๏ธ Widget Parameters#

AttributeTypeDescription
client_idstringYour Rillis client ID (optional if using propsByUrl).
flowstringFlow ID to trigger (optional if using propsByUrl).
metadatastringOptional metadata to associate with the session.
propsByUrlbooleanIf true, widget will read config from the URL instead of attributes.
fullpagebooleanKeeps the verification button always visible.
environment"test" or "production"Controls which environment to connect to (default is production).
langstringLanguage of the widget UI ("en" for English, "es" for Spanish, etc.).
buttonStylesstringInline CSS to customize the button appearance.
buttonTextstringCustom text for the button (e.g., "Start Verification").
disableDefaultStylesbooleanRemoves default button styling if you want full control via CSS.

๐ŸŽจ Example with Custom Styling#

โšก Emitted Events#

onRillisSuccess: Emitted when the verification is successfully submitted.
onRillisError: Emitted when an error occurs during the verification process.
These are CustomEvent type events. They can be listened for from anywhere in your project, such as in your index.html file:

๐Ÿงฉ Framework Compatibility#

Because itโ€™s a native Web Component, the Rillis Widget works with all major frontend frameworks, including:
React (via dangerouslySetInnerHTML or custom wrappers)
Vue
Angular
Vanilla JS or static HTML
You can fully control when and how the widget appears and even dynamically inject it based on user interaction.
Modified atย 2026-02-09 15:36:36
Previous
Update Blacklist Settings Account
Next
Flow Step: Identity Verification
Built with